Measuring length
Depth gaugeDepth gauge (vernier / dial / digital)
Also called: vernier depth gauge, dial depth gauge
≡Standards, measuring range and accuracy
- Standard
- JIS B 7518:2023 Geometrical product specifications (GPS) – Dimensional measuring equipment – Depth gauges (Mitutoyo's explanation covers the 2018 revision)
- Measuring range
- byMaker
- Mitutoyo VD (527-101–105) 0〜150 / 200 / 300 / 600 / 1000 mm
- Teclock dial type Stroke 10 / 20 / 30 mm (220–240 mm with extension rods)
- byMaker
- Resolution / graduation
- byMaker
- Mitutoyo VD Minimum reading 0.02 mm (0.05 mm for VDS)
- byMaker
- Accuracy (instrument error / maximum permissible error)
- Approach In JIS B 7518 (2018), "instrument error" became "indication error". The most important is the partial surface contact error E, which applies to depth measurement. Place two gauge blocks of the same size on a precision surface plate, seat the base measuring face on them with the beam measuring face on the plate, and subtract the gauge dimension from the indicated value
- byMaker
- Mitutoyo VD15 (0–150 mm, 0.02 mm) E_MPE ±0.03 mm
- Mitutoyo VD100 (0–1000 mm) E_MPE ±0.07 mm
▦Types
◎Part names and functions
| # | Name | English | Function |
|---|---|---|---|
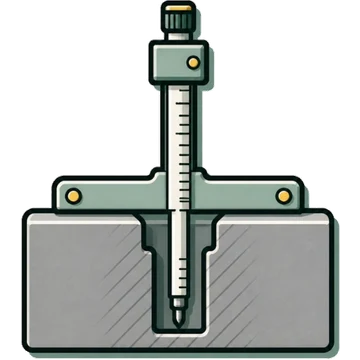
| 1 | Base (reference surface) | Base / reference face | A wide face placed firmly against the top surface of the workpiece.[4][6] |
| 2 | Beam (measuring face) | Main beam / measuring face | Touches the bottom to measure depth.[4][2] |
| 3 | Contact point, bezel, dial face, long hand, short hand, clamp (dial type) | Contact point, bezel, dial, pointers, clamp | Turn the bezel to set 0 and fix it with the clamp.[6] |
◷How to read the scale
✋Usage steps
- Preparation: wipe the beam and sliding parts with a little micrometer oil, and clean the reference surface with a dry cloth[4]
- Operation check: move the base through its full travel. On a vernier type, take care that the beam does not come out of the base[4]
- Zeroing: set the origin on a surface with guaranteed flatness such as a precision surface plate (for the dial type, seat the base bottom on the origin surface, turn the bezel to set 0, and fix it with the clamp)[4][6]
- Measurement: with the reference surface firmly seated on the workpiece, extend the beam (contact) to the bottom and read[4][6]
- Reading: read from the front and watch for parallax[4]
Printed from Kezuriba (kezuriba.net/en/gauges/depth-gauge/)
!Common measurement mistakes and countermeasures
✓Care, storage, inspection and calibration
Care and storage
- After use, check for damage and clean. If water-soluble cutting fluid got on it, apply rust prevention. Release the clamp and store away from high temperature and humidity. For long-term storage, apply rust prevention and remove the battery[4]
Inspection and calibration
⇄Related instruments
📚Sources
Content without a mark is what agreed across two or more sources from different publishers. Procedures and cautions are summarized in Kezuriba's own words based on the sources, and the diagrams were drawn by Kezuriba. Accuracy values are manufacturers' published figures, not values from JIS tables.
- Japanese Standards Association (JSA), "JIS B 7518:2023 Geometrical product specifications (GPS) – Dimensional measuring instruments – Depth gauges (bibliographic record)"
- Mitutoyo, "Depth Gauge Fundamentals (indication error under JIS B 7518)"
- Mitutoyo, "Quick Guide to Precision Measuring Instruments (Catalog No. E11003(7), as of August 2024)"
- Mitutoyo, "Depth Gauges: ABS Digimatic Depth Gauge and How to Use Depth Gauges"
- Mitutoyo, "Depth Gauge VD 527-101 Specifications"
- Teclock, "General Catalog 4: Depth Gauges"
- Mitutoyo, "How to Use a Caliper Correctly: Reading and Cautions"
- Niigata University, "Niigata University Faculty of Engineering, Technical Staff Training Text, Chapter 1: Workshop Measurement"