Measuring length
Depth micrometerDepth micrometer
Also called: interchangeable-rod depth micrometer
≡Standards, measuring range and accuracy
- Standard
- JIS B 7544:1994 Depth micrometers, ASME B89.1.13 Micrometers (including depth)[1][2]
- Measuring range
- byMaker
- Mitutoyo DMC (129-109 and others) 0–50 / 75 / 100 / 150 mm (interchangeable rods)
- byMaker
- Resolution / graduation
- byMaker
- Mitutoyo DMC Resolution 0.01 mm
- byMaker
- Accuracy (instrument error / maximum permissible error)
- byMaker
- Mitutoyo DMC60 (base width 60) Flatness of reference face 1.3 µm, flatness of measuring face 0.3 µm
- Approach Indication error table not confirmed
- byMaker
▦Types
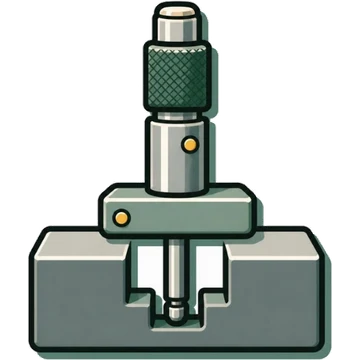
◎Part names and functions
| # | Name | English | Function |
|---|---|---|---|
| 1 | Base (reference surface) | Base / reference face | Pressed against the top surface of the workpiece. Large area.[3][4] |
| 2 | Rod (measuring face) | Rod | Swapped onto the tip of the spindle to change the range.[3][4] |
| 3 | Thimble, sleeve, ratchet stop | Thimble, sleeve, ratchet stop | [3][4] |
| 4 | Rod collar | Rod collar | When changing rods, remove dirt from the contact area with the spindle end face.[4] |
◷How to read the scale
✋Usage steps
- Turn the thimble through its full travel to check operation, and remove dirt from the reference face and measuring face[4]
- Press the reference face against a surface with guaranteed flatness such as a precision surface plate, turn the ratchet stop 3–5 turns, and confirm the zero point. If the zero point is 25 mm or more, use gauge blocks[4]
- If the zero point is off, turn the sleeve (barrel) to adjust it[4]
- When measuring hole depth the bottom is often not visible, so move the base and measure several times to confirm that the rod is touching the bottom[3]
- Read from the front, and for long sessions check the zero point periodically[4]
Printed from Kezuriba (kezuriba.net/en/gauges/depth-micrometer/)
!Common measurement mistakes and countermeasures
Dirt, oil, and burrs on the reference surface
WhyThe base area is large, so it is easily affected
CountermeasureClean the reference surface of the workpiece and remove burrs[3]
✓Care, storage, inspection and calibration
Care and storage
- After use, check for damage and clean, and store with the clamp released. For long-term storage, apply rust prevention to the rods and reference face and remove the battery[4]
Inspection and calibration
- Check the zero point with a precision surface plate and gauge blocks[4]
⇄Related instruments
📚Sources
Content without a mark is what agreed across two or more sources from different publishers. Procedures and cautions are summarized in Kezuriba's own words based on the sources, and the diagrams were drawn by Kezuriba. Accuracy values are manufacturers' published figures, not values from JIS tables.
- Japanese Standards Association (JSA), "JIS B 7544:1994 Depth micrometers (bibliographic record)"
- ASME「ASME B89.1.13 Micrometers」
- Niigata University, "Niigata University Faculty of Engineering, Technical Staff Training Text, Chapter 1: Workshop Measurement"
- Mitutoyo, "How to Use Interchangeable-Rod Depth Micrometers"
- Mitutoyo, "Depth Micrometer DMC 129-109 Specifications"