Measuring length
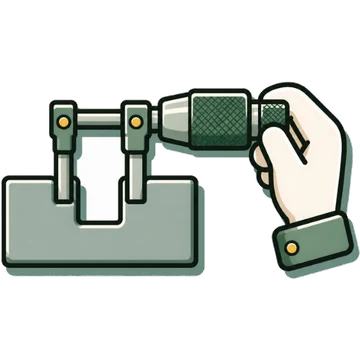
Inside micrometerInside micrometer
Also called: caliper-type inside micrometer, rod-type inside micrometer, single-unit inside micrometer
≡Standards, measuring range and accuracy
- Standard
- Unconfirmed whether the scope of JIS B 7502 (micrometers) includes inside and depth micrometers
- ASME B89.1.13 covers outside, inside, and depth micrometers
- Measuring range
- byMaker
- Mitutoyo IM series (rod type) 50–75 mm to 200–225 mm in 25 mm steps (133-143 to 133-149)
- General Extendable to large diameters. In Mitutoyo's US materials, up to 80 inches with rods and pipes
- byMaker
- Resolution / graduation
- Graduation 0.01 mm (Mitutoyo IM series)
- Accuracy (instrument error / maximum permissible error)
- Approach Like an outside micrometer, it is controlled by indication error. A rod type is also affected by misalignment (tilt), self-weight sag, and temperature
- byMaker
▦Types
◎Part names and functions
| # | Name | English | Function |
|---|---|---|---|
| 1 | Jaws (measuring faces) | Jaws | Caliper type: two jaws pressed against the inside surface of a hole.[2] |
| 2 | Thimble, sleeve, ratchet stop (or friction stop) | Thimble, sleeve, ratchet/friction stop | The reading section is the same as on an outside micrometer.[2][3] |
| 3 | Heat shield cover (rod type) | Heat insulator | Wear gloves and hold here to prevent expansion from body heat.[5][3] |
◷How to read the scale
- Reading is the same as for an outside micrometer. Note, however, that the scale direction is reversed on the caliper type[2]
✋Usage steps
- Apply the caliper type in the same way as a caliper's inside measurement, so that the two jaws capture the true diameter of the hole[2]
- For a rod type, rock it in the hole and use the fact that tilting axially reads long (positive side) and tilting radially (side to side) reads short (negative side) to find the position of the true diameterMitutoyo's US materials explain finding the minimum position by turning the micrometer head while rocking the tool inside the hole. The final value is obtained by adding to or subtracting the reading from the value set on a reference (setting ring, etc.)[5][3]
- Do not hold it bare-handed; wear gloves and hold the heat shield cover[5][3]
- When laying it horizontally to set the zero point, support it at two points at the Airy points (where the two end faces are most parallel) or the Bessel points (where the overall length error is smallest)[5][3]
Printed from Kezuriba (kezuriba.net/en/gauges/inside-micrometer/)
!Common measurement mistakes and countermeasures
✓Care, storage, inspection and calibration
Care and storage
- Follow the outside micrometer (the sources have little that is specific to inside micrometers)[3]
Inspection and calibration
- Set or check the zero point with a setting ring or an outside micrometer (no primary source for the specific procedure was found)[7]
A diagram of the scale direction on the caliper type would help prevent misreading.
⇄Related instruments
📚Sources
Content without a mark is what agreed across two or more sources from different publishers. Procedures and cautions are summarized in Kezuriba's own words based on the sources, and the diagrams were drawn by Kezuriba. Accuracy values are manufacturers' published figures, not values from JIS tables.
- ASME「ASME B89.1.13 Micrometers」
- Niigata University, "Niigata University Faculty of Engineering, Technical Staff Training Text, Chapter 1: Workshop Measurement"
- Mitutoyo, "Quick Guide to Precision Measuring Instruments (Catalog No. E11003(7), as of August 2024)"
- Mitutoyo, "How to Use Micrometers Correctly and Cautions"
- Mitutoyo, "How to Use Bore Measuring Instruments, Basics"
- Mitutoyo, "Inside Micrometer IM 133-143 Specifications"
- Mitutoyo, "Mitutoyo Product Fundamentals (Bulletin No. 2180, Mitutoyo America)"