Limit gauge
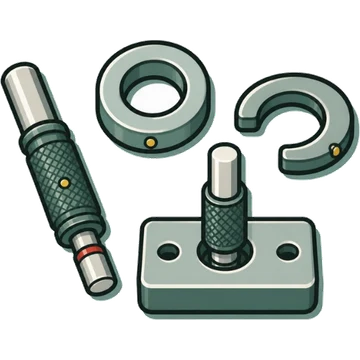
Limit plain gauges (plug gauge, ring gauge, snap gauge)Plain limit gauge (plug / ring / snap gauge)
Also called: limit gauge, plug gauge, ring gauge, snap gauge, GO/NO-GO gauge
≡Standards, measuring range and accuracy
- Standard
- JIS B 7420:1997 Limit plain gauges[1][2]
- Measuring range
- —Not confirmed in public sources
- Resolution / graduation
- Description No graduations; it only judges pass or fail
- Accuracy (instrument error / maximum permissible error)
- —Not confirmed in public sourcesThe gauge tolerance tables have not been checked
▦Types
Plain plug gauge (for holes): GO end and NO-GO end
[2]1 source, for reference
Plain ring gauge (for shafts): GO end and NO-GO end
[2]1 source, for reference
Plain snap gauge (for shafts)
[2]1 source, for reference
Symbols: PP (plain plug), PR (plain ring), PC (plain caliper = snap gauge)
[2]1 source, for reference
◎Part names and functions
| # | Name | English | Function |
|---|---|---|---|
| 1 | GO end and NO-GO end | Go side / Not-go side | Used as a pair.[2] |
◷How to read the scale
- Pass if the GO end goes through and the NO-GO end stops[2]
✋Usage steps
- Wash the gauge and workpiece with cleaning oil, benzine, etc., or wipe them thoroughly with a clean cloth. Check the gauge for rust, scratches and burrs, and remove them with an oilstone if present[2]
- Apply lubricating oil to the gauge and brush chips and dust off the workpiece before inspecting (dust and grit speed up wear)[2]
- First check that the GO end goes through, then check that the NO-GO end stops[2]
- As a rule the force is the weight of the gauge itself (the working load for snap gauges). Hold small gauges lightly between the fingertips[2]
- Align the gauge and workpiece axes when fitting. If misaligned they may seize and become impossible to remove[2]
Printed from Kezuriba (kezuriba.net/en/gauges/plain-limit-gauge/)
!Common measurement mistakes and countermeasures
Forcing it through or knocking it out
WhyScratches, cracks and deformation destroy the gauge's function
CountermeasureIf it seizes, tap lightly with a wooden or plastic hammer so the axes line up, or warm the ring side slightly to remove it[2]
Inspecting parts right after machining or parts held in the hand
WhyThermal expansion throws off the judgment. Thin-walled parts can cool and shrink onto the plug in a shrink-fit state
CountermeasureConsider the temperature difference between the gauge and the workpiece. Gauge dimensions are defined at 20 °C[2]
Dents and burrs at the mouth
WhyIt throws off the judgment
CountermeasureCheck the mouth of the part[2]
Inspecting a moving part
WhyDanger of dropping, breakage and flying parts
CountermeasureInspect while it is stopped[2]
✓Care, storage, inspection and calibration
Care and storage
- Do not store it fitted to a workpiece or ring (causes sticking and rust)[2]
- Remove dust, chips and fingerprints and rust-proof (cleaning → fingerprint neutralizer → rust-preventive oil, or rust-preventive paper/bag), and store in a place with little humidity and temperature change[2]
- Demagnetize it if magnetized (iron powder sticks and speeds up wear)[2]
Inspection and calibration
- Watch for wear and inspect periodically according to how often it is used. Do not use a gauge beyond its wear limit[2]
Taylor's principle (the GO gauge checks the overall form, while the NO-GO gauge checks one point at a time) appears by name only in OSG's material; no primary source defining it was found.
⇄Related instruments
📚Sources
Content without a mark is what agreed across two or more sources from different publishers. Procedures and cautions are summarized in Kezuriba's own words based on the sources, and the diagrams were drawn by Kezuriba. Accuracy values are manufacturers' published figures, not values from JIS tables.