BroachDesign, Selection and Troubleshooting
A broach is a tool with many cutting teeth arranged in order of size (roughing, semi-finishing and finishing teeth). A single pull (or push) takes a hole or an outside surface from rough cut to finish. It cuts internal forms such as spline holes, serrations, internal gears, keyways and round holes, and external surfaces (surface broaching) such as the fir-tree slots in turbine disks, with high accuracy in volume production. The rise per tooth and the pitch are fixed at design and manufacture, so the only thing the operator can change is the cutting speed. That is why every specification item must be settled at the design and ordering stage.
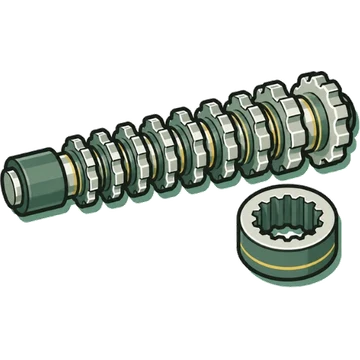
✎How to Design and Select
Open a heading to see its contents. When printed, everything is shown open.
Design Basics and Overall Flow
7
- The basic rule of broach design is to make the tool as compact and as dense as possible. An unnecessarily long broach with excess margin is hard to make, lowers accuracy, raises cost, and in use reduces workpiece accuracy and causes handling problems.[1]One source / reference
- Cutting length and pilot hole diameter strongly affect the overall length of the broach, so do not allow excessive margin.[1]One source / reference
- Specifications of an internal broach are designed from the specifications of the broaching machine to be used (shank shape and size, pulling capacity, stroke length, mountable length) and from the shape and size of the workpiece. The items are often independent of each other, so check every one of them without omission.[1]One source / reference
- Flow from specifications to design values (summary of Fig. 17 in Mitsubishi Materials): <Workpiece> cutting length → pitch, number of teeth cutting at once, chip volume / broach type, material, hardness → rise per tooth, rake angle, tool material / pilot hole size → pilot size and shape / finished size → cutting dimension (total stock removal) → number of teeth → cutting section length → overall length. <Machine and fixture> pull head type → front shank; retrieving head → rear shank; pulling capacity → check of cutting load; stroke → check of cutting section length; maximum and minimum mountable length → check of overall length. The gullet shape (depth, land width, pitch) is determined from the chip room study.[1]One source / reference
- A broach packs all the stages (roughing, semi-finishing and finishing) into one tool, so product quality depends heavily on the tool. The key points of design are to make each cutting tooth rigid enough to allow a large rise per tooth, while making the chip pocket as large as possible so chips are not caught between the workpiece and the teeth. The tool is a dedicated design for each product.[2][1]
- The depth of cut during machining is held by the balance of cutting forces on each tooth. If even one tooth wears early, for example because chips jam, the balance shifts and some teeth take an excessive cut, which causes vibration and early wear and spoils quality.[2]One source / reference
- A very long, slender broach can cause problems in manufacture and use, so it is recommended to split it into two or more pieces and use them as a set (combination broach).[1]One source / reference
Names of Parts and Construction
5
- An internal broach consists of, from the front: front shank, front pilot, first tooth, roughing teeth, semi-finishing teeth, finishing teeth, rear pilot and rear shank. Dimensions are called shank length (to the first tooth), cutting section length, rear shank length and overall length. Roughing and semi-finishing teeth have pitch, land width, back face, rake angle, relief angle, gullet depth and gullet bottom radius (chip room); finishing teeth have a straight land and a relief angle.[1][2]
- The front and rear shanks are the parts held by the broaching machine (in one example the front shank is held by the lower chuck and the rear shank by the upper chuck). The front pilot is placed just ahead of the first tooth and guides the workpiece correctly onto the first tooth.[3][1]
- There are two constructions: solid and assembled. For large-diameter helical broaches, the usual design was an assembled type in which the rough tooth section (body) cuts the outside diameter and the finish tooth section (shell) cuts the tooth thickness, but there are also one-piece types that combine body and shell.[1]One source / reference
- The hard broach from Nachi-Fujikoshi (for finishing after heat treatment) consists of carbide replaceable blades and a broach holder with a front pilot, front shank and rear shank. The carbide blade is a hollow cylinder about 25–40 mm in diameter and about 200 mm long, with cutting teeth in order of size formed integrally on its outside; one or two blades are mounted in the holder.[3]One source / reference
- Tool length is long, from 800 mm to 2,400 mm, so the broaching machine needs a structure that can feed smoothly over a stroke at least as long as the tool. Large-diameter helical broaches are about φ100–φ180 in outside diameter and 1,500–2,500 mm in overall length.[2][1]One source / reference
Shank, Front Pilot and Shank Length
6
- The size of the front shank is determined by the model of broaching machine used. It must fit easily into the workpiece, pull head and retrieving head, withstand the cutting force during pulling, and be easy and reliable to operate.[1]One source / reference
- The front shank comes in three forms: cotter type, round-neck type and threaded type. Standards are JIS B4237 for the cotter type, JIS round-neck type and threaded type, and DIN 1415 for the DIN round-neck type. Rear shanks come in round-neck and trapezoidal-groove types (JIS B4237) and DIN type (DIN 1415); choose to match the retrieving head of the broaching machine (according to the user's instruction). The rear shank is provided so that a vertical broaching machine can lift the broach.[1]One source / reference
- The front pilot must be at least as long as the workpiece. If the workpiece has a relief (undercut) in the middle or on the datum side, add it to the cutting length. The standard tolerance width of the pilot hole diameter is 0.05 mm, and a g7 fit tolerance is used for the pilot diameter.[1]One source / reference
- As a guideline, the clearance between the broach front pilot and the workpiece pilot hole should be within 0.03 mm (except special settings such as press-fit types). Large clearance causes eccentricity.[4][1]
- The shank length (length to the first tooth) is set so that the first tooth does not touch the workpiece when the broach is mounted on the machine in the cutting position. If the front shank length is specified (DIN type, user standard, etc.), it can be calculated by adding the pilot length, but it is generally set by considering the dimension to each machine's table and the fixture thickness.[1]One source / reference
- The rear pilot is placed behind the last tooth and supports the workpiece until the last finishing tooth completes its cut. Its diameter is the minimum finishing diameter of the round finishing tooth, and its length is about equal to its diameter.[1]One source / reference
Cutting Length and Total Stock Removal (Cutting Dimension)
4
- The cutting length is the length over which the workpiece is broached: the overall workpiece length minus the relief length (cutting length = l1 + l2). The workpiece length (L) is used when considering the shank length.[1]One source / reference
- When the cutting length is short (8 mm or less as a guideline), stack pulling (pulling several workpieces stacked together) is recommended for stable machining (life, accuracy, etc.) and broach economy. When the cutting length is short and the number of teeth cutting at once varies, take this into account when choosing the pitch. Chamfers on the end faces of the machined section are normally not considered.[1]One source / reference
- Total stock removal = finished size − minimum pilot hole diameter. For broaches with round teeth, choose a pilot hole diameter that gives a round-tooth stock removal of 0.2–0.35 mm in general, with a tolerance of +0.05.[1]One source / reference
- The stock allowance for hard broaching (finishing after heat treatment) is 0.3 mm or less on diameter. Pre-machining is done by ordinary broaching.[3]One source / reference
Rise per Tooth (Cut per Tooth) and Roughing, Semi-finishing and Finishing Teeth
6
- The cut per roughing tooth (diameter difference between adjacent teeth) is determined by considering the workpiece material and hardness, the type and size of the broach, and the capacity of the broaching machine.[1]One source / reference
- Standard cut per tooth for steel (Mitsubishi Materials Fig. 14, values on diameter): for spline broaches, about 0.033 mm at a broach diameter near 5 mm, about 0.057 mm at 20 mm, about 0.072 mm at 40 mm, and about 0.08 mm at 60–70 mm. For round broaches, about 0.02 mm near 5 mm, about 0.033 mm at 20 mm, and about 0.04 mm at 40 mm and above. (Values read from the graph.)[1]One source / reference
- If the length of the cutting edge in cut changes greatly, change the cut per roughing tooth in 2 or 3 steps according to the change in cutting edge length.[1]One source / reference
- Several semi-finishing teeth follow the roughing teeth, and the cut per tooth is reduced gradually to improve the finished surface. The finishing teeth have zero cut, and several (usually 4) are provided.[1][2]
- With drills and turning, the operator can choose feed and depth of cut, but the cut per tooth of a broach is fixed at design, and the only thing the operator can change is the cutting speed.[1][2]
- In designing a fir-tree broach (turbine slot), the best gullet pitch and cut per tooth are determined from the workpiece material, cutting length and shape. The shape and length are then examined to meet equipment conditions such as the pulling load, stroke and number of holder rows of the broaching machine, and the final tooth layout is decided.[5]One source / reference
Pitch and Number of Teeth Cutting at Once
5
- The cutting tooth pitch is normally found from P = k·Lw^1/2 (P: pitch, k: coefficient, Lw: cutting length). k is about 1.2–1.6 and becomes larger as the cut per tooth increases. Round the calculated pitch up in 0.5 mm steps so that (1) Lw/P is not an integer and (2) Lw/P exceeds 2.[1][2]
- The number of teeth cutting at once must be 2 or more. In broaching, no special fixture is used and the workpiece is held by the cutting force the broach produces, so at least one cutting tooth must always be engaged in the workpiece.[2][1]
- Unequal pitch is used to prevent resonance during cutting. It is especially effective on round broaches for preventing chatter and waviness on the machined surface and for improving dimensional accuracy. Unequal pitch is set at ±0.5 mm or ±1 mm of the base pitch.[1]One source / reference
- The gullets of large-diameter helical broaches come in a perpendicular-to-axis (ring groove) type and an off-normal (helical groove) type. With the perpendicular-to-axis type, the number of teeth engaged in cutting varies, so the cutting load fluctuates widely, and vibration accelerates wear and damage of the teeth and shortens tool life. With the off-normal type, the number of engaged teeth is almost constant and load fluctuation is small, which improves profile accuracy and tool life, but dedicated regrinding equipment is required.[1]One source / reference
- If the cutting edge is inclined slightly from the cutting direction, chips become helical and are discharged more easily, and because the teeth do not cut in all at once, the change in cutting force is gradual and vibration is reduced. However, a force component perpendicular to the feed direction arises, and on an internal broach the workpiece tends to rotate, so it must be held by the fixture.[2]One source / reference
Gullet Shape and Chip Pockets (Chip Storage)
7
- The gullet shape consists of pitch, land width and gullet depth, and affects chip room volume, cutting edge strength and the number of regrinds. With the pitch as the base, it is expressed as L = 0.25–0.3P (land width), H = 0.3–0.5P (gullet depth) and R1 = 0.4–0.6H (gullet bottom radius).[1]One source / reference
- Gullet volume should be at least 6 times the volume of chips produced in cutting, and usually about 10 times. This is a safety factor for changes in chip shape as the cutting teeth wear. Use a larger factor where the operator cannot monitor constantly, such as on automatic machines.[1][2]
- In broaching, the chips from the entire cutting length must be stored in the chip room. The chip room is designed to suit the cutting length, so if a workpiece longer than the drawing specifies is cut, chips jam, the finished surface becomes very poor, and tooth chipping or breakage can occur.[1][6]
- Broach chip length is always shorter than the cutting length, about 1/2 to 1/4 of it. The chip thickness increases 2 to 4 times accordingly. Chip thickness varies with rake angle, material, edge condition, cutting speed, cutting oil and so on.[1]One source / reference
- The best chip shape is a tightly curled spiral, which is what tough work materials produce. The softer the material, the larger the curl diameter. Chips of brittle materials such as cast iron do not curl and are not bulky, so the chip room volume can be small.[1]One source / reference
- A harmful step at the gullet bottom, an excessive land width or insufficient gullet depth causes chip clogging and leads to tooth chipping and breakage. Sharpen so that no step is left at the gullet bottom.[6][7]One source / reference
- On fir-tree broaches, stress tends to concentrate at the crest of the gullet under cutting load, and breakage from insufficient strength is likely. Optimize the gullet depth and the edge formed by the gullet to avoid stress concentration.[5]One source / reference
Rake Angle, Relief Angle, Land and Side Relief
6
- Standard rake and relief angles (Mitsubishi Materials Table 4, rake angle / relief angle on roughing teeth / relief angle on finishing teeth): high-tensile steel 10–15° / 2° / 1°, medium-tensile steel 13–18° / 2° / 1°, cast steel 8–15° / 2° / 1°, cast iron 8–10° / 2° / 1°, malleable cast iron 8–10° / 2° / 1°, copper alloy 5–8° / 1° / 30′, aluminum alloy 15–20° / 3° / 1°30′.[1]One source / reference
- The rake angle used on broaches ranges from 5° to 25° and varies with conditions.[1]One source / reference
- The relief angle is made smaller than on other tools to keep small both the diameter loss from regrinding and the variation in cut per tooth caused by variation in regrinding stock. As a result, cutting oil has difficulty penetrating to the cutting edge during cutting.[1]One source / reference
- With a small shear angle, the shear plane is long, chips are thick, and cutting force is large. With a large shear angle, chips are thin and cutting force is small. A larger rake angle and higher cutting speed give thin chips with little shear deformation. However, a larger rake angle makes the cutting edge thinner so it wears faster, and long chips with little curl do not fit in the pocket easily.[1][2]
- Side relief: if the contact area between the workpiece and the tooth flank is large, welding occurs on the flank and tearing tends to appear on the finished surface. Side relief is provided on the sides to reduce flank friction. There are two methods, the land-retaining method and the back-taper method, chosen according to tooth form, tooth depth and workpiece material (heat-treated or not).[1][8]
- Unlike ordinary broaches, hard broaches (carbide) use a blunt (obtuse) rake angle to increase edge strength and chipping resistance.[3]One source / reference
Nicks (Chip Splitting) and Zigzag Cutting
2
- On round teeth or wide teeth, adding nicks prevents chips from interfering with each other and makes them flow out easily. When cutting parallel grooves such as in a straight-sided spline, the chip becomes wider than the cutting edge because of the resistance when it forms and scratches the machined side, but splitting the chip with nicks prevents this. Stagger the nicks so they do not overlap on adjacent teeth.[1][2]
- If a fir-tree broach cuts the finished form directly in full-form cutting, wide full-form chips come out and do not curl in the pocket, causing tearing and chip clogging. In finishing broaches, zigzag cutting, which combines the finish tooth profile with a rough tooth profile of a different shape, is used to break up the chips.[5]One source / reference
Checking Cutting Section Length, Overall Length and Broach Strength
3
- Cutting section length = number of teeth × pitch. This value plus the cutting length, and plus the rear shank length if needed, must be within the stroke of the broaching machine.[1]One source / reference
- Overall length = shank length + cutting section length + rear pilot length + rear shank length. It must satisfy the mountable length of the broaching machine.[1]One source / reference
- Check that the broach can cut well within the pulling capacity of the machine used, using the safe load, which is the expected load multiplied by a safety factor of 1.8 (formula in Formulas). Then check that the broach itself is strong enough for the safe load by finding the allowable load from the minimum cross-sectional areas of the tooth section and the shank. The smaller one is the allowable load FP, and it must be at least the safe load FS.[1][9]
Choosing the Cutting Method and Round Tooth Placement
6
- Cutting methods fall broadly into ordinary (OD-progressive) and contour (form / tooth-thickness-progressive). The outside diameter (upward) progressive method changes the tooth thickness little with resharpening and guides well on the workpiece, so tooth form distortion is small. However, a constant form land is left, so it welds easily. It is used for general broaches.[1][8]
- The outside diameter (upward) progressive sizing method (two passes) has low cutting force when finishing the tooth form and small machining distortion. It is especially effective for thin-walled workpieces (fir-tree broaches, high-accuracy use).[8]One source / reference
- The back-taper method makes the tooth thickness of the rear teeth slightly smaller and gives the tooth flank a slight relief to improve cutting action and prevent welding. It suits long cutting lengths and materials that weld easily.[8][1]
- The tooth thickness (form) progressive method transfers the broach tooth profile directly onto the workpiece, giving excellent profile accuracy and surface finish. It is used for gear and high-accuracy broaches.[8]One source / reference
- A spline broach with round teeth places round teeth in front of, behind, or alternating with the spline teeth, and machines the bore and the spline in one tool. Front round teeth: when pilot hole accuracy is poor (the pilot hole accuracy is improved before the tooth spaces are cut). Rear round teeth: the standard arrangement when the minor diameter is finished by the broach. Alternating round teeth: when concentricity between the spline tooth spaces and the minor diameter is required. Front round teeth + alternating round teeth: when pilot hole accuracy is poor and concentricity is also required.[8][1]
- One example of a cutting method for large-diameter helical broaches (for internal gears of automatic transmission ring gears) cuts with the rough tooth section as outside-diameter cutting teeth and the finish tooth section as tooth-thickness cutting teeth, with an alternating round tooth section between them. Making the tool one-piece reduces the tooth thickness finishing allowance, which improves gear accuracy, lightens the load on each tooth and reduces wear, and increases the number of workpieces per regrind. It also removes the need to disassemble, assemble and fine-adjust the phase of the shell.[1]One source / reference
Choosing Tool Material and Surface Treatment
8
- Tooth section materials are high-speed steel (SKH51 = AISI M2, SKH55, powder-metallurgy HSS). In the Mitsubishi Materials selection table, KMC3 (SKH55) is best for carburizing steel, tough steel, carbon steel (tensile strength 600 N/mm2 or more) and stainless steel, with powder-metallurgy HSS good; SKH51 is good for free-cutting steel, cast steel, cast iron, aluminum alloy and copper alloy; and powder-metallurgy HSS (KHA) is best for titanium alloy and nickel alloy.[1]One source / reference
- In Nidec Machine Tool's selection criteria, SKH51 and SKH55 are for general steel and non-ferrous metals; the company's GRANMET BR (melted HSS made specially for broaches, for corner wear) is for general steel and non-ferrous metals; MAC-B (powder-metallurgy HSS) is for general steel, hard steel and non-ferrous metals; and MAC-D (high-alloy powder-metallurgy HSS) is used for difficult-to-cut materials, super heat-resistant steel and similar.[8][10]One source / reference
- Powder-metallurgy HSS has fine carbides and a uniform structure, so it has better toughness and wear resistance than melted HSS and keeps a sharp edge longer. In interrupted-cut broaching it improves finished surface accuracy and reduces variation in dimensional change. On high-hardness difficult-to-cut materials in particular, a life of 2 times or more that of melted HSS is said to be obtained (machining examples: round, S48C 250HB, 1,500 pieces vs 800; spline, SCr420 200HB, 7,200 pieces vs 3,600).[1]One source / reference
- Surface treatments are divided into nitriding (nitrided oxide) types and PVD coating types. Nitriding diffuses nitrogen into the HSS surface at high temperature to form a hard layer, and has excellent anti-welding properties. PVD coatings (TiN, Al-based, AlCrN-based, etc.) are very hard and wear resistant, and are effective against corner wear and for machining with water-soluble coolant.[8][1][11][12]
- Nidec Machine Tool's Nano Dynamic (PVD, Al-based ceramic layer) gives a broach tooth surface roughness of Ra 0.03 μm, reduces tearing on the machined tooth surface, has a life 2 times that of TiN by the company's comparison, and can be applied to lengths up to 2,000 mm (1,400 effective range). The company's Nano Dynamic II is AlCrN-based, Hv3,000, and is said to be effective against corner wear of the cutting edge and for machining with water-soluble coolant.[13][11]One source / reference
- Mitsubishi Materials' STH (an improved nitrided-oxide treatment) and GV21 (TiN-based PVD): TiN and GV21 are not recommended for round broaches. In the company's recommended-range chart, the region with small workpiece major/minor diameter tolerances and small BPD tolerance is STH, and the region where the major/minor diameter tolerance is roughly 0.02 mm or more and the BPD tolerance is 0.03 mm or more is GV21 (read from the chart).[1]One source / reference
- The hardness that HSS broaches can machine is said to be up to about 35 HRC. For finishing after heat treatment (50–62 HRC), there are hard broaches that use replaceable blades of ultra-fine-grain carbide with a coating (Nachi-Fujikoshi).[3]One source / reference
- High-alloy powder-metallurgy HSS is used for aircraft and prime mover turbines (Ni-base heat-resistant alloys, etc.). For Inconel718 and similar, the number of disks machined per regrind is only a few, so machinability is very poor compared with ferrous materials.[5][14]
÷Formulas
Pulling Force Calculator
From the workpiece and tooth conditions, this finds the pulling force the broaching machine needs by the formulas of two companies.
Enter the cut per tooth as a radial value (half the diameter difference).
The specific cutting force C is the value from Table 5 of the Mitsubishi Materials catalog (cut 0.02–0.15 mm), connected linearly between table values. C is not calculated for a cut that has no value in the table. Nidec's f (kgf/mm²) is chosen from the 5 categories in its source (when you change the work material it is matched to the nearest category, but reselect it to suit the steel hardness). The two formulas are based on slightly different ideas (C is larger for thinner cuts), so the results do not agree. When choosing a machine, allow margin on the larger value.
Pulling Force (Expected Cutting Load) and Safe Load — Mitsubishi Materials Formula
F = L × ΔR × C / L = N × π × D (round broach), L = N × Z × W (spline / serration broach) / FS = 1.8F < pulling capacity[1]1 source · reference
- F
- Expected cutting load (kN)
- L
- Maximum total length of cutting edges cutting at once (mm)
- ΔR
- Radial cut per tooth (mm)
- C
- Specific cutting force (kN/mm2, Table 5)
- N
- Number of teeth cutting at once (Lw/P rounded up to an integer)
- D
- Maximum diameter (mm)
- Z
- Number of teeth
- W
- Spline width (maximum tooth width) (mm)
- FS
- Safe load (kN). Safety factor 1.8
Worked Example The source gives no worked example. Table 5 of specific cutting force C (kN/mm2) (cut per tooth 0.02 / 0.04 / 0.06 / 0.08 / 0.10 / 0.15): high-tensile steel 4.5 / 3.6 / 3.2 / 2.9 / 2.7 / —, medium-tensile steel 3.6 / 2.7 / 2.5 / 2.3 / 2.2 / 2.0, cast steel — / 2.4 / 2.1 / 1.9 / 1.8 / 1.6, cast iron — / 1.9 / 1.7 / 1.6 / 1.5 / 1.4, malleable cast iron — / 2.2 / 1.9 / 1.7 / 1.6 / 1.6, copper alloy — / — / 1.5 / 1.3 / 1.2 / 1.1, aluminum alloy — / — / 1.3 / 1.1 / 1.0 / 0.9
Required Pulling Force — Nidec Machine Tool Formula
F = f × n × Q (kgf) / n = ℓ / P (rounded up to an integer) / round hole: Q = π × d × a, spline hole: Q = a × t × m[9]1 source · reference
- F
- Required pulling force (kgf)
- f
- Specific cutting resistance (kgf/mm2). Steel up to HRC30: 300, HRC30–35: 350, HRC35–40: 400 / malleable cast iron: 200 / cast iron, bronze, aluminum: 100
- n
- Number of teeth cutting at once (teeth)
- Q
- Total cutting area of one tooth (mm2)
- ℓ
- Workpiece thickness (mm)
- P
- Broach tooth pitch (mm)
- d
- Broach outside diameter (mm)
- t
- Cutting width of one tooth (mm)
- m
- Number of spline teeth
- a
- Stock removal per broach tooth (mm)
Worked Example Round hole φ50 (d), workpiece thickness 40 mm (ℓ), material SCM415, HRC25. f = 300 kgf/mm2, p = 9.5 mm → n = 40/9.5 = 4.2 → 5 teeth. a = 0.02 mm → Q = 3.14 × 50 × 0.02 = 3.142 mm2. F = 300 × 5 × 3.142 = 4712 kgf ≈ 46.2 kN. A pulling capacity of 50 kN or more is needed, and choosing a broaching machine of 75 kN or more is recommended to leave margin.
Pitch
P = k·Lw^1/2 (Mitsubishi Materials) / P = 1.2–2 √L (Nachi-Fujikoshi Vol.9)[1][2]
- P
- Cutting tooth pitch (mm)
- k
- Coefficient. About 1.2–1.6, larger as the cut per tooth increases (Mitsubishi Materials)
- Lw
- Cutting length (mm)
- L
- Called "tool length" in the notation of Nachi-Fujikoshi Vol.9
Worked Example The source gives no numerical example. Round the pitch up in 0.5 mm steps so that Lw/P is not an integer and exceeds 2 (Mitsubishi Materials).
Number of Teeth Cutting at Once
n = L / P (must be 2 or more)[2][9][1]
- n
- Number of Teeth Cutting at Once
- L
- Cutting length (workpiece thickness) (mm)
- P
- Pitch (mm)
Worked Example Round up to an integer in the pulling force calculation (example: 40/9.5 = 4.2 → 5 teeth).
Gullet Shape (Land Width, Gullet Depth, Gullet Bottom R)
L = 0.25–0.3P, H = 0.3–0.5P, R1 = 0.4–0.6H[1]1 source · reference
- P
- Pitch (mm)
- L
- Land width (mm)
- H
- Gullet depth (mm)
- R1
- Gullet bottom radius (mm)
Worked Example The source gives no numerical example.
Chip Pocket Volume Condition
Pocket volume ≥ chip volume (L × t) × 6 (Mitsubishi Materials: "at least 6 times, usually about 10 times")[2][1]
- L
- Length that forms the chip (Fig. 4 of Nachi-Fujikoshi Vol.9; corresponds to the cutting length) (mm)
- t
- Cut (cut per tooth, which forms the chip thickness) (mm)
Worked Example The source gives no numerical example. Use a larger factor where monitoring is not possible, such as on automatic machines.
Total Stock Removal, Cutting Length, Cutting Section Length and Overall Length
Total stock removal = finished size − minimum pilot hole diameter / cutting length = l1 + l2 / cutting section length = number of teeth × pitch / overall length = shank length + cutting section length + rear pilot length + rear shank length[1]1 source · reference
- l1, l2
- Length of the machined portion excluding the relief (mm)
Worked Example The source gives no numerical example. Cutting section length + cutting length (+ rear shank length if needed) must be within the stroke, and the overall length within the mountable length of the broaching machine.
Broach Strength (Allowable Load)
FP = σB × A / S > FS (S = 3) / simplified formulas: tooth section Ft = 0.6 × At, shank Fc = 0.4 × Ac[1]1 source · reference
- FP
- Allowable load (the smaller of Ft and Fc)
- σB
- Tensile strength (kN/mm2)
- A
- Minimum cross-sectional area
- S
- Safety factor = 3
- At
- Minimum cross-sectional area of the tooth section
- Ac
- Minimum cross-sectional area of the shank
- FS
- Safe load (= 1.8F)
Worked Example The source gives no numerical example. σB differs between the shank and the tooth section, so calculate with the simplified formulas. The units are not stated in the source (since σB is in kN/mm2, A can be read as mm2 and F as kN).
Grinding Wheel Diameter for Regrinding
D = 0.85·d·sin(β−γ) / sin γ[1]1 source · reference
- D
- Grinding wheel diameter (mm)
- d
- Broach diameter (mm)
- β
- Wheel inclination angle (°)
- γ
- Rake angle (°)
Worked Example From Table 6: d = 30, β = 40°, γ = 12° → D = 57 (calculated by the formula, 0.85 × 30 × sin28° / sin12° ≈ 57.6). d = 20, β = 50°, γ = 14° → D = 41.
Calculating BPD (Between-Pin Diameter) (Parallel Block Method)
BPD = measured width of the parallel block only + gauge block size / gauge block size = BPD on the drawing − parallel block nominal size + 1–2 mm[15]1 source · reference
- BPD
- Dimension between pins (mm)
- Parallel block
- Example with a nominal size of 25 mm
Worked Example BPD on the drawing 35 mm (pin φ1.5 mm), parallel block 25 mm → gauge block 35 − 25 + 2 = 10 mm. If the width of the parallel block alone is 24.955 mm, BPD = 24.955 + 10.0 = 34.955 mm.
⚠Troubleshooting
Open a symptom to see the possible causes and fixes. The causes are not necessarily to be suspected from the top down. They change with the combination of workpiece, machine and tool.
Broach stops during cutting / pulling force suddenly increases[1][2]p.116
Main causes
- Insufficient power of the broaching machine
- Increased cutting force from welding, tooth chipping or abnormal wear (wear of only about 0.1 mm on a cutting tooth can add several tons of resistance)
- Poorer machinability from a change in workpiece material
- Chip clogging
Fixes
- Use a broaching machine with enough power (check expected load × 1.8 < pulling capacity)
- Remove welding, chipping and abnormal wear by regrinding. Change the cutting oil
- Check the composition, structure and hardness of the workpiece
- Check that no workpiece longer than the specified cutting length is being machined, and remove chips completely
- Monitor the rise in cutting force in process
Chatter[1][6]p.116
Main causes
- Too few teeth cutting at once
- Springback of the workpiece
- Resonance from the pitch and cutting length
- Insufficient rigidity of machine and fixture
- Unsuitable cutting conditions or cutting oil, difficult-to-cut workpiece
Fixes
- Check that no workpiece shorter than the specified cutting length is being machined. If the cutting length is short, stack-pull
- Make the workpiece wall thicker
- Support the rear end. Use unequal pitch (±0.5 mm or ±1 mm of the base pitch)
- Repair and maintain the machine and fixture to increase rigidity
Tearing on the sides (tooth flank / groove sides)[1][8]p.116
Main causes
- Welding on the side of the cutting teeth
- Large contact area between the tooth flank and workpiece (insufficient side relief)
- Work material is too soft and welds easily to the land
Fixes
- Remove welded material by regrinding
- Change the cutting oil
- Provide side relief (land-retaining method or back-taper method)
- Review the work material hardness (about 200–240 HB is said to suit steel)
Tearing and galling on the outside (machined surface)[1][6]p.116
Main causes
- The finished surface is scraped by a worn cutting edge
- Welding on the cutting teeth
- Chipping on the cutting teeth
- Nicks (impact marks) on the cutting teeth
- Chips scrape the machined surface
- Interference at places other than the cutting edge
- Excessive stock removal
- Unsuitable rake angle
- Edge rounding (dulled edge)
- Unsuitable or deteriorated cutting conditions and cutting oil
- Insufficient rigidity of the broaching machine
- Difficult-to-cut workpiece
Fixes
- Improve cutting action by regrinding (remove welding, chipping and damage)
- Remove chips completely
- Change the cutting oil
Scoring (streak-like scratches)[1]p.117
Main causes
- Chipping on the cutting teeth
- Nicks (impact marks) on the cutting teeth
- Welding on the cutting teeth
Fixes
- Remove chipped areas, damage and welded material by regrinding
- Change the cutting oil
Large burr[1]p.116
Main causes
- Poorer machinability from a change in workpiece material
- Deteriorated cutting action
Fixes
- Check the composition, structure and hardness of the workpiece. Change the cutting oil
- Improve cutting action by regrinding
Edge breakout on the workpiece at the broach exit[1][6]p.117
Main causes
- Cutting load increases
- The workpiece has no backup metal
Fixes
- Improve cutting action by regrinding. Change the cutting oil
- Consider changing the workpiece shape or the machining process
Tooth chipping and breakage[1][6]p.117
Main causes
- Poor broach mounting
- Chip clogging (poor gullet shape: excessive land width, insufficient gullet depth, a step in the gullet, poor cutting action)
- Excessive stock per tooth (design dimension error, poor machining of adjacent pitch)
- Machining a workpiece longer than the design cutting length
- Workpiece binding, workpiece shifting during machining
Fixes
- Improve the mounting method
- Check that no workpiece longer than the specified cutting length is being machined
- Remove chips completely. Change the cutting oil
- Do not leave a step at the gullet bottom when sharpening
Go gauge does not enter / size is too small (outside the (−) tolerance of major diameter, minor diameter or inner pin diameter)[1][6]p.117
Main causes
- Eccentricity of the machined hole
- Abnormal wear of the corners of the cutting teeth
- Finished size is below the lower tolerance limit (outside the (−) tolerance of broach size or over-pin diameter)
- Shrinkage from poor cutting action
- Shrinkage from springback (the thinner the wall, the smaller the hole diameter)
- Shrinkage from cutting heat
- Defective broach tooth profile
Fixes
- Check the cutting teeth for chipping and nicks, and remove them by regrinding if present
- Machine the datum surface and pilot hole correctly
- Remove worn areas and improve cutting action by regrinding
- Make the workpiece wall thicker / provide the workpiece drawing and have springback considered
No-go gauge passes / size is too large (outside the (+) tolerance of major diameter, minor diameter or inner pin diameter)[1][6]p.117
Main causes
- Large burr from rake face grinding (effect of burr)
- Outside the (+) tolerance of broach size or over-pin diameter
- Tearing
- Defective broach tooth profile
- Eccentricity
Fixes
- Remove the burr
- When ordering, decide whether "oversize due to burr" is acceptable
Eccentricity of the machined hole relative to the pilot hole (outer circumference)[4][1][2]p.107
Main causes
- Machine: poor accuracy of the broaching machine (levelness of the faceplate, squareness between puller and travel direction, damaged sliding surfaces, play), uneven application of cutting oil
- Tool: uneven cutting edges and uneven wear of the cutting edges around the circumference, runout of the sharpened surface, poor gullet shape (harmful step), bent broach (little effect when the cutting length is short)
- Workpiece: pilot hole accuracy (excessive clearance between the front pilot and pilot hole, roundness and cylindricity, tilt of the pilot hole relative to the machining datum), pilot hole too large so the broach shifts to one side, mounting datum surface not square to the pilot hole, uneven metal structure
- The broach shifts sideways toward the direction of least resistance because of an imbalance in cutting force (the broach is merely supported by the puller)
Fixes
- Simple check: mark the workpiece, set a phase reference on the broach, machine several pieces while rotating 90° each time, and find the position of maximum runout. If the eccentricity is always in the same direction relative to the workpiece mark, it is the machine; if it moves with the broach phase, it is the tool; if it is scattered, it is the workpiece
- Machine: check squareness with a test bar, check sliding surfaces and play, and apply cutting oil evenly over the whole circumference and length of the teeth
- Tool: check the cutting edges with a magnifier, measure the runout of the sharpened surface, and measure bending with a center stand and dial indicator
- Workpiece: keep the clearance between the front pilot and pilot hole within 0.03 mm, improve the squareness of the seat face to the pilot hole, and check the hardness distribution
Bent broach, and poorer dimensional accuracy and finished surface[1][2]p.107
Main causes
- The pilot hole is not square to the mounting datum surface
- The pilot hole is too small or bent, so the front pilot does not enter
Fixes
- Machine the pilot hole accurately and square to the datum surface
Variation in hole diameter and poorer roundness (thin-walled workpieces, workpieces with uneven wall thickness)[1]p.108
Main causes
- During machining, the thrust force makes the workpiece deform elastically and plastically and bulge, then spring back after machining
- The wall thickness varies in the circumferential and cutting directions
Fixes
- Use a shape with a large datum contact area and thick wall (example: with a round broach of 32.025 mm, cutting length 50 mm, 235–250 HB and rake angle 15°, the thinner the wall, the smaller the hole diameter and the worse the roundness. Read from the graph, roundness is stable when the wall is thicker than about 7 mm)
- This cannot be prevented on the tool side, so consider machining accuracy and workpiece shape thoroughly
Short tool life[1][7]p.107
Main causes
- Work material is too hard (fast wear)
- Built-up edge fragments or hard foreign matter in the pilot hole
- Water, lubricating oil, light oil, etc. mixed into the cutting oil
- Continued use after the tool stops cutting, which increases the regrinding amount
- Commercial cutting oil unsuited to broaching
- Large cutting load fluctuation with perpendicular-to-axis gullets (large-diameter helical broaches)
Fixes
- Review the hardness of the work material
- Clean the pilot hole
- Manage the cutting oil and choose a suitable one
- Regrind early and often, and keep each regrinding amount to a minimum
- Review the tool material and surface treatment (powder-metallurgy HSS, coatings, etc.)
- Consider off-normal gullets and one-piece construction
Chips do not curl and stick in the gullet pocket (difficult-to-cut materials)[5][1]p.106
Main causes
- Chips from a worn cutting edge do not curl (Inconel718 example)
- Wide chips from full-form cutting
- Insufficient chip pocket volume
- Poor regrinding deforms the chip curl
Fixes
- Regrind before wear progresses (chips that stick cannot be removed easily with a brush)
- Break up the chips with zigzag cutting or nicks
- Make the chip pocket larger
↻Regrinding and Tool Life Management
- Choosing the right time to regrind is the most important thing in managing workpiece accuracy and broach life. If you keep using the broach after it stops cutting, wear progresses rapidly and the regrinding amount also increases, which causes trouble. Regrinding often to keep each regrinding amount to a minimum makes a large difference in the total number of pieces one broach can cut (its life).[7]One source / reference
- Guide to sharpening timing (broach side): when the land from wear starts to look white at the cutting edge (wear width under 0.05–0.1 mm); when abnormal wear, chipping or tooth breakage occurs; when chips start to stick to the gullet; when chips weld to the side of the cutting teeth or the relief face.[7][2]
- Guide to sharpening timing (workpiece and machine side): when machined dimensions are out of specification, the go gauge does not enter, the surface roughness of the machined surface is poor, or there is excessive heat at the end of cutting. On the broaching machine, when the pulling force increases unreasonably (when it has increased 30% from the initial pulling load).[7]One source / reference
- Way of thinking about tool life: wear goes from initial wear to steady wear to rapid wear, and life is taken as the point before rapid wear begins. A broach is generally judged to be at end of life, and reground, at a flank wear width of 0.1 mm.[2][7]
- Sharpening procedure: mount the broach on centers and use a steady rest. As a guide, the wheel diameter is 2–3 times the broach diameter and the wheel surface speed is 1,300 m/min or more. Offset the centers of the broach and wheel slightly. Find the wheel setting angle (from the quick-reference table supplied with the sharpening machine, or from the Mitsubishi Materials wheel diameter formula and Table 6).[7][1]
- To regrind to the correct rake angle, set the wheel diameter and the mounting angle (wheel inclination angle) correctly (formula D = 0.85·d·sin(β−γ) / sin γ).[1][7]
- Check the rake angle and the gullet bottom R with a dedicated gauge. Do not leave a step on the rake face and gullet bottom so that chips flow smoothly. The surface roughness of the rake face is 3.2S or less (target 1.6S).[7]One source / reference
- On roughing teeth, make the sharpening amount uniform across all the roughing teeth to keep the stock per tooth constant. If there is welded material on a cutting tooth, remove it with an oilstone or similar before sharpening.[7]One source / reference
- If the burr from rake face grinding is large, the no-go gauge passes (the size becomes larger). Remove the burr.[1]One source / reference
- Poor regrinding appears as deformed chip curl.[1]One source / reference
- Regrinding example (one-piece large-diameter helical broach, Mitsubishi Materials Table 3): regrinding stock 0.06–0.11 mm, number of regrinds 22–30, workpieces per regrind 1,300–6,000.[1]One source / reference
- The hard broach (carbide replaceable blade) can be reused repeatedly by regrinding the rake face of the cutting edge. On involute tooth surface machining, total cutting length per regrind is 90 m or more (3000 pieces or more at a cutting length of 30 mm), and the number of regrinds is about 6–15 depending on the product tolerance width.[3]One source / reference
- Large-diameter helical broaches of the off-normal (helical groove) type require dedicated regrinding equipment.[1]One source / reference
◎Tool Inspection
- Bending of the broach: mount it on a center stand and check bending at each part with a dial indicator. Also measure the runout of the sharpened surface.[4]One source / reference
- Condition and wear of the cutting edge: check with a magnifier or similar (simply, look at how chips adhere around the circumference). When the land from wear starts to look white, it is time to sharpen.[4][7]One source / reference
- Rake angle and gullet bottom R: check with a dedicated gauge. Also check that there is no harmful step in the gullet.[7][4]One source / reference
- For the tooth thickness of a machined spline hole, it is preferable to evaluate BPD (between-pin diameter) measured with pins rather than BBD (between-ball diameter). The pin contacts the point of minimum tooth thickness in the lead direction, which suits checking the fit.[15]One source / reference
- BPD parallel block method: use a parallel block that stays parallel wherever it is slid. Use a gauge block 1–2 mm larger than the drawing specifies. Place the parts, press with your fingers just enough that the pins do not fall when lifted, lift the workpiece along with them, and clamp the parallel block by hand (do not tap it; pressing somewhat firmly gives better repeatability). Measure the width of the parallel block alone and add the gauge block size. It works for many sizes with inexpensive tools, but takes skill and time, and the block will not fit if the BPD is small. Have several people measure and compare to check the variation.[15]One source / reference
- For dimensional control of spline tooth surfaces, use the dimension between measuring pins fitted at opposing positions.[3][15]
- Large-diameter helical broaches (JIS grade 4 or better) have been made by measuring the tooth profile in-line with a gear measuring device attached to a profile grinding machine. Previously, the shell section, which needs high accuracy, was made separately in pieces and measured on a separate profile inspection device.[1]One source / reference
- For fir-tree broaches, a test piece of the same material as the disk is trial-machined on a dedicated broaching machine to guarantee the machined shape and tool accuracy. The product tolerance range on the pressure face is normally a dozen or so μm, and only about 5 μm is allowed in broaching, and there must be no step (mismatch) at the joints between broaches.[5]One source / reference
- Broaching is prone to tool problems during the process, so it is good to be able to monitor increases in cutting force and tool breakage in process (a record of pulling force is a basis for judgment).[2][7]One source / reference
☑What to Specify When Ordering
These are the items to give the tool maker when requesting a quotation or manufacture. Most of them are determined from the gear data table (the table on the drawing).
| Item | Why it is needed / how to decide |
|---|---|
| Broach type (involute, serration, straight-sided spline, trapezoidal / round, half-round, double-flat) | The specification form differs by shape, and the items for finished dimensions change.[1] |
| Whether a workpiece drawing is available | With a drawing, springback can be considered. Without a drawing, springback is not guaranteed.[1] |
| Applicable standard, part name and part number (whether to enter them on the drawing) | Decide the standard that is the design basis (for example JIS B1601 straight-sided spline, JIS B1603 involute spline, JIS B4239 involute spline broach).[1] |
| Work material, hardness and cutting length | These determine cut per tooth, rake angle, tool material, pitch and chip room. Cutting length strongly affects overall length, so do not allow excessive margin. Cutting a workpiece longer than the drawing specifies causes chips to jam.[1] |
| Finished dimensions (involute spline: m or DP, PA, NT / straight-sided spline: NT / serration, trapezoidal: NT, specify missing teeth and joined teeth separately / round: diameter, half-round and double-flat: diameter and width) | These are the basis for deciding broach shape, dimensions and tolerances, and the cutting method (round tooth placement).[1] |
| Pilot hole dimensions | They determine the total stock removal (= finished size − minimum pilot hole diameter) and the front pilot dimensions. The standard tolerance width of the pilot hole diameter is 0.05 mm, and for broaches with round teeth choose a pilot hole that gives a round-tooth stock removal of 0.2–0.35 mm.[1] |
| Broaching machine (type, capacity in kN, stroke in mm) | Needed to check the shank shape, pulling capacity (safe load FS = 1.8F < capacity), and that cutting section length + cutting length is within the stroke. The maximum and minimum mountable length also affect overall length.[1][9] |
| Whether a broach drawing is available and how to handle it (design to the supplied drawing / maker's standard may be used) | When a drawing is supplied, decide whether it may be changed to match the maker's standard. Write any problems in the remarks column.[1] |
| Tool number and marking | Specify the control number and what to engrave on the broach.[1] |
| Broach material and surface treatment (none, nitrided oxide, STH, TiN, GV21, other) | Choose to suit the work material and dimensional tolerance (TiN and GV21 are not recommended for round broaches).[1] |
| Heat treatment after broaching and heat treatment distortion compensation (workpiece compensation: major diameter, minor diameter, BPD; for round types, major diameter and width / no compensation) | When the workpiece is heat treated after machining, this allows the dimensional change from heat treatment in the broach dimensions.[1] |
| Oversize due to burr (not allowed / allowed only for the first piece / allowed for both the first piece and after regrinding) | Decide how far to accept the problem of oversize caused by burr from rake face grinding.[1] |
| Front shank (JIS standard, maker standard, other / four-jaw, cotter or pin type / flat and its positioning / dimension to the No.1 tooth or to the pilot, φ × length / reference drawing number) | Match it to the pull head of the broaching machine. This determines the shank length (length to the first tooth).[1] |
| Rear shank (required or not; enter dimensions if there is a drawing or not) | Needed on vertical broaching machines that lift the broach with a retrieving head. Determined by the user's instruction to suit the machine.[1] |
| Round teeth (none, front, rear, alternating) | Choose according to the required pilot hole accuracy and concentricity with the minor diameter. The source states that round-type broaches cannot be made with flat teeth.[1][8] |
| Overall length specification (none = quoted overall length / yes = specified overall length) | Specify it when the mountable length or stroke of the broaching machine is a constraint.[1] |
| Special notes (whether an English drawing is needed), quantity and delivery category | Tell the maker the drawing language, the quantity and the delivery category.[1] |
Printed from Kezuriba (kezuriba.net/en/gears/tools/broach/)
+Related Topics
Features of Broaching and Where It Suits
3
- Features: extremely short cycle time with high accuracy. Complex shapes that are the same along the axis are easy. Cut per tooth and total stock removal are fixed at design and manufacture, so no skill is needed. Good finished surface and stable dimensional accuracy. The workpiece is held by the cutting pressure. It is also used in high-mix low-volume production.[1][2]
- A broaching machine can be built with a single linear (or rotary) axis, and tool path programming and NC control are basically unnecessary. However, cutting force of several to several tens of tons occurs intermittently, so enough power and a highly rigid machine structure are needed. Tools are dedicated to each product and expensive, from several hundred thousand to several million yen each.[2]One source / reference
- Comparison of internal tooth machining methods (table in the Nachi-Fujikoshi catalog): broaching is ◎ for productivity and machining accuracy, but △ for setup, △ for initial equipment investment, × for initial tooling cost, × for blind-hole shapes, × for profile and lead correction, and × for machining after heat treatment. Shaping and skiving can machine blind holes, and skiving is also ○ for profile and lead correction and for machining after heat treatment.[12]One source / reference
Types of Broaches and Uses
7
- Round broaches (round, double-flat, D-type): finish accurate round holes without precision pre-machining such as reaming. Types with burnishing teeth or two-stage finishing are available to improve the finished surface.[1]One source / reference
- Spline broaches: straight-sided splines with parallel, square cross-section teeth (JIS B1601) and involute splines (JIS B1603; broach JIS B4239) for shaft-to-hole connection in power transmission.[1]One source / reference
- Serration broaches: for semi-permanent connection of shaft and hole. Triangular serrations and involute serrations are the common ones.[1]One source / reference
- Special (hole) broaches: machine complex shapes that other methods could not produce, with high accuracy and efficiency and without skilled labor (the classification table lists triangular, involute and ball groove; the figure shows examples such as a round hole combined with grooves).[1]One source / reference
- Helical broaches: for helical groove holes (automotive and electrical parts) and for helical internal gears (shell-assembled type and one-piece type). Large-diameter helical broaches are used for the internal gears of automatic transmission ring gears.[1]One source / reference
- Operation is by pulling or pushing. Tools are internal broaches for machining inside diameters and surface broaches for machining outside forms.[1][2]
- Classification by function: roughing and finishing, with chamfering teeth, with burnishing teeth, with round teeth (front round teeth, rear round teeth, alternating round teeth).[1]One source / reference
External broaches: turbine disk blade slots (fir-tree, dovetail)
5
- The mounting slots that fit jet engine disks and blades together are dovetail (pigeon-tail) shaped on compressor disks and fir-tree shaped on turbine disks, which spreads stress well under high temperature and pressure. Dozens of slots are broached around the whole circumference of the disk.[5]One source / reference
- A fir-tree slot is machined with a set of a dozen or more broaches, each with a different shape for each part machined. Example: broaches No. 1–2 cut the slot, Nos. 10 and 11 rough the form, No. 12 finishes the skirt (hakama) section, No. 13 finishes the form section, and No. 14 finishes the slot bottom. Power generation gas turbines have larger machined areas, and one set is about 50 broaches.[5]One source / reference
- For aircraft engine workpieces, in addition to form accuracy, surface condition (surface texture such as roughness and tearing, and surface integrity such as altered layers and plastic deformation of the surface layer) is a key point in judging tool life. In an example cutting Inconel706 at a cutting speed of 7 m/min and a cut of 60 μm, hardness increase was seen down to 0.1 mm from the surface, and rose further after 35 m of cutting length.[5]One source / reference
- Turbine broach materials aim at longer life with high-alloy powder-metallurgy HSS and similar for difficult-to-cut materials. Grinding that keeps burrs low gives a sharp cutting action.[14][5]
- Fir-tree broaching machines come in vertical and horizontal types. The horizontal type has a long pulling stroke and handles large disks. The vertical type can handle both left and right helix with one machine, and can mount broaches in several rows to make the machine compact (Nachi-Fujikoshi example).[5]One source / reference
Machining Conditions and Preparation (Cutting Speed, Work Material Hardness, Pilot Hole, Cutting Oil)
6
- Recommended cutting speeds (Mitsubishi Materials Table 1, m/min, work material hardness up to 150 HB / 150–250 / 250–350 / 350–450): carburizing steel, tough steel, carbon steel (600 N/mm2 or more) — / 8–5 / 5 / 3; stainless steel 9 / 8–6 / 5–3 / 3–2; free-cutting steel 12–9 / 10–8 / — / —; cast steel 8 / 6–4 / 4–3 / —; cast iron 9–6 / 5–3 / 3 / —; aluminum alloy 15–10 / — / — / —; copper alloy 12–8 / 9–6 / — / —; titanium alloy and nickel alloy 8 (up to 250) / 6–4 / 3–2.[1]One source / reference
- Broach cutting speed is usually about 2–8 m/min, but high-speed broaching at 15–40 m/min or more is also done. Compared with about 5–15 m/min on conventional machines, there are broaching machines sped up to 60 m/min with a servo motor and ball screw drive (Nachi-Fujikoshi hard broaching machine HW-5008; 50–60 m/min is appropriate for hard broaches).[1][2][3]
- A suitable hardness for broaching steel is said to be about 200–240 HB. Extremely soft steel welds easily to the land, and the finished surface suffers from galling and tearing. If it is too hard, wear is fast and life is short.[1]One source / reference
- Make the pilot hole accurate: (1) it must be square to the mounting datum surface (otherwise the broach bends and dimensional accuracy and finished surface suffer); (2) if it is too small or bent, the front pilot will not enter, and if it is too large, the broach shifts to one side and eccentricity grows; (3) built-up edge fragments or hard foreign matter shorten tool life extremely. The broach is fed along the pilot hole as its reference path, so the squareness between the workpiece seat face and the bore is important. Keep the contact surfaces with the fixture flat and clean.[1][2]
- Purposes of cutting oil: to give a good finished surface, improve dimensional accuracy, reduce wear of the cutting teeth and make chip removal easier. A broach has a small relief angle so oil has difficulty reaching the cutting edge, which makes choosing the best cutting oil important. Some commercial broaching oils are also unsuitable. If water, lubricating oil, light oil, etc. get mixed in, the finished surface becomes extremely poor and abnormal wear can occur.[1]One source / reference
- Machining with water-soluble cutting oil is a disadvantageous condition for tool life, and in some cases coatings with high heat and wear resistance (AlCrN-based, etc.) are used to cope. There are also hard broaching systems that machine with MQL (oil mist of about 10 cc per hour).[11][12][3]
Hard Broaching (Finishing After Heat Treatment)
2
- Machining to remove heat treatment distortion of heat-treated parts. It can machine hardness up to 50–62 HRC, with a stock allowance of 0.3 mm or less on diameter. It is used widely for spline holes of about φ25–φ40 mm, involute spline tooth surfaces, CVT ball grooves, various odd-shaped holes and surface machining.[3]One source / reference
- Machining example: an involute spline that was about JIS grade 6 (JIS B1603) after heat treatment was raised to the equivalent of JIS grade 4. Variation in dimension between pins 5 μm, profile accuracy 3 μm, lead accuracy 2 μm.[3]One source / reference
Standard Dimension Tables for Front and Rear Shanks (Where to Find Them in the Catalog)
1
- The Mitsubishi Materials catalog has dimension tables: Table 7 cotter-type shank (JIS B4237, nominal 10–100, p110), Table 8 JIS round-neck shank (JIS B4237, nominal 8–100, p111), Tables 9 and 10 DIN shank (DIN 1415, nominal 4–18 / 20–100, p112–113), Table 11 threaded shank (JIS B4237, M6–M20, p113), Table 12 round-neck and trapezoidal-groove rear shank (JIS B4237, nominal 12–100, p114), Table 13 DIN rear shank (DIN 1415, nominal 12–100, p115). Avoid nominal sizes in ( ) where possible. The tolerance of shank diameter d is f8 of JIS B0401.[1]One source / reference
⚙Other Gear Cutting Tools
📚Sources
Values without a mark agree in two or more sources from different publishers. Grade and coating names are the makers' product names, and no comparison between makers has been made. "p." is the body page of the Mitsubishi Materials catalog (C004J-H).
- Mitsubishi Materials (mmc-carbide.com)
- Nachi-Fujikoshi (nachi-fujikoshi.co.jp)
- Nachi-Fujikoshi (nachi-fujikoshi.co.jp)
- Nidec Machine Tool (nidec.com)
- Nachi-Fujikoshi (nachi-fujikoshi.co.jp)
- Nidec Machine Tool (nidec.com)
- Nidec Machine Tool (nidec.com)
- Nidec Machine Tool (nidec.com)
- Nidec Machine Tool (nidec.com)
- Nidec Machine Tool (nidec.com)
- Nidec Machine Tool (nidec.com)
- Nachi-Fujikoshi (NACHI) — Precision tools: gear cutting tools and broaches, Catalog No.2305 (2016)
- Nidec Machine Tool (nidec.com)
- Nidec Machine Tool (nidec.com)
- Nidec Machine Tool (nidec.com)