Skiving cutterDesign, Selection and Troubleshooting
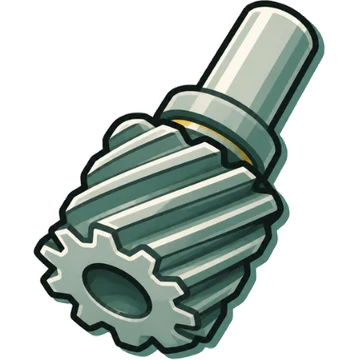
A skiving cutter is a gear-shaped rotary tool, similar to a pinion cutter, that is tilted relative to the workpiece (crossed-axes angle) and fed along the face width while rotating in sync at the tooth-count ratio, cutting the teeth. The sliding produced by the crossed-axes angle becomes the cutting speed. With no reciprocating motion it is faster than a gear shaper, and it can machine internal gears, external gears and stepped workpieces, including on multitasking machines.
✎How to Design and Select
Open a heading to see its contents. When printed, everything is shown open.
How it cuts (crossed-axes angle and sliding)
4
- The tool axis and workpiece axis are mounted crossed (crossed-axes angle) and the two are rotated in sync. The crossed-axes angle makes the movement directions of the tool cutting edge and the workpiece differ, producing sliding (relative speed) that cuts the tooth space. The tool is fed along the face width as the workpiece rotates to cut the teeth[1][2][3][4]
- A gear shaper reciprocates the tool in the axial direction, but skiving cuts by rotary motion, so there is no air cutting and machining time can be cut substantially[3][2]
- Because it machines continuously while meshing with the workpiece and the tool profile is transferred to the workpiece, accuracy is high (ISO grade 4–5 with pinion-type skiving). Lead adjustments such as crowning and taper are also possible[2][1]
- The principle has been known for a long time, but it was not put to practical use because of machine rigidity and tool life problems. It has recently been reassessed thanks to advances in materials and coatings, tool manufacturing technology, rigidity from direct-drive motors, high-precision synchronized NC and simulation[1][3][4]
Suitable workpieces and processes
5
- It can be used for internal gears, external gears, internal splines and external splines. It can be done on multitasking machines (lathes, machining centers) or on dedicated skiving machines[5][6][7]
- On a multitasking machine, turning through gear cutting can be done in one chucking, enabling continuous machining of an external gear and external spline on a shaft part, machining parts with both external and internal gears, and phase matching of two gears[5][3]
- Applicable processes are green (soft) gear cutting and tooth-flank finishing after heat treatment (finishing heat-treated internal teeth with a carbide cutter, with cases at new JIS grade 5 or better)[1][8]
- Productivity guideline: at least 2 times that of a gear shaper (NACHI); 2–5 times, with quality 1–2 grades better and tool life comparable to a shaper (Liebherr). The internal-gear type suits low-volume, high-mix, small-scale lines (NACHI)[6][9]
- Disadvantages: running tool cost is higher than a broach. When cutting external teeth in the soft state, tool life is shorter than with hobs and shapers (for internal teeth it is equivalent to a shaper)[1]One source / reference
How to choose the crossed-axes angle
10
- The main parameter that produces cutting speed is the crossed-axes angle Σ between tool and workpiece. The helix angle β also plays a part, but Σ is the main factor in obtaining sufficient cutting speed[4]One source / reference
- Increasing the crossed-axes angle increases the relative speed (sliding)[1][10]
- Recommended conditions for internal teeth: crossed-axes angle about 20° (NACHI). The internal-tooth machining examples also use a 20° crossed-axes angle[1][6]One source / reference
- External gears are theoretically harder to cut than internal gears, so the crossed-axes angle is made larger (30° or more) to raise cutting performance and machining accuracy (example: an external m2.7, 20° RH, 27T gear cut with a 30° crossed-axes angle and a 10° LH, 34T cutter)[6][1]One source / reference
- When a straight-tooth tool with no helix is used on a helical gear, the crossed-axes angle is matched to the workpiece's helix angle. In this case, to get sufficient cutting speed the workpiece helix angle must exceed 10°[4]One source / reference
- When the tool also has a helix angle: for the same helix hand the crossed-axes angle is the difference, for opposite hands the sum (workpiece 15° and tool 20°: 5° for the same hand, 35° for opposite). If workpiece and tool have the same helix angle and hand, the crossed-axes angle is 0 and no skiving motion arises[4]One source / reference
- Even for helical gears, the tool tilt can be chosen separately from the helix angle. With a helix angle of 20° or more, a spur-type tool can be used set to the crossed-axes angle. When the crossed-axes angle is set to a value different from the helix angle, the tool rake face orientation and side relief angle are calculated from the difference between the helix angle and crossed-axes angle[4]One source / reference
- A larger crossed-axes angle makes interference with internal gears more likely, so Mitsubishi Heavy Industries' (now Nidec) Super Skiving cutter has a barrel-shaped tool to avoid interference and allow a large crossed-axes angle[2][11]One source / reference
- With a small crossed-axes angle, a small gear alongside a large gear (cluster gear) can be machined without collision[8]One source / reference
- The tool profile is obtained from the cross-section of the workpiece's basic rack (trapezoidal space) cut by a plane at the crossed-axes angle Σ. The tool profile calculation takes into account the crossed-axes angle and the rake face offset[4][9]
Number of tool teeth and workpiece teeth
6
- To reduce workpiece runout and raise pitch accuracy, the tool's (theoretical) tooth count and the workpiece tooth count should have no common divisor. The same applies to solid (one-piece) skiving cutters[4]One source / reference
- The tool and workpiece rotate in sync at a speed corresponding to the tooth-count ratio (ω_work = Z_tool / Z_work × ω_tool). For helical gears, additional rotation is added according to the feed[5][4]
- Examples of tool tooth counts (NACHI): 30T for internal 70T, 50T for internal 78T, 58T for internal 75T, 71T for internal 96T (after heat treatment), 56T for external 90T, 34T for external 27T[1][6]One source / reference
- With external teeth, fewer tool teeth are working than with internal teeth, so chip thickness is about twice that of internal teeth[1]One source / reference
- With an indexable cutter head, the blades are placed at every 2nd, 3rd or 4th position of the basic profile, and only some of the theoretical tooth count are actual blades (virtual tooth count). If the virtual tooth count and the workpiece tooth count are in a hunting relationship, there is no disadvantage[4]One source / reference
- There is a case where a missing-tooth profile was machined with a one-blade tool and a 1:3 synchronization ratio. Methods that change the synchronization ratio give uneven meshing and large load fluctuation, and chipping is expected, so a high-rigidity tool shape was used[3]One source / reference
Rake angle and relief angle (effective rake angle changing during cutting)
7
- In skiving the cutting direction changes from the start to the end of the cut. The rake angle is positive at the start of the cut and the effective rake angle turns negative during the cut. When negative, the cut is harder and cutting temperature rises (comparison: 580°C at a 5° rake angle, 710°C at −30°), and cutting load becomes large at the end of the cut[5]One source / reference
- With conventional pinion-type cutter skiving, the angle between the tool rake face and the machined surface becomes strongly negative during cutting (obtuse rake angle), so cutting force is large and tool life is short[2][11][5]
- Calculation example of the minimum effective rake angle (m1.5, 56T tool, 20° crossed-axes angle, 10° rake angle, 0.200 mm/rev feed, 3.075 depth of cut): −36.8° for external 90T and −17.0° for internal 80T. Maximum chip thickness is 0.281 mm for external and 0.137 mm for internal[1]One source / reference
- A skiving blade's rake face is a plane connecting the cutting edges on both sides, so the side rake angle cannot be made positive on both sides. As a compromise, a side rake angle of 0° is accepted. A top rake angle can be added to sharpen the edge, but with carbide blades a top rake angle over 4° tends to chip near the edge[4]One source / reference
- A conical tool has a built-in relief angle by its structure and is normally placed on center. A cylindrical tool needs to be tilted or placed offset from center[9]One source / reference
- Tool tilt angle can be used to increase the effective relief angle between blade and groove, and to eliminate interference between the back of a long spur-type tool with a small relief angle and the groove. Within its range it can also be used to correct the pressure angle[4]One source / reference
- The Super Skiving cutter adds cutting-edge grooves and relief angles to a barrel-shaped grinding wheel shape, and tapers the outer circumference of the roughing region so that all teeth take part in cutting. Where a pinion-type cutter cuts in 3 passes, 3 teeth cut in 1 pass, and the number of cuts per tooth is 1/3[2]One source / reference
Relief for stepped and blind (non-through) shapes
6
- Blind shapes (stepped and flanged parts) can be machined[6][7][2]
- A gear shaper needs a 3–5 mm relief section before the step, but skiving needs none, so the product can be made compact and its strength raised[3]One source / reference
- It can machine right up close to the root, which a hob cannot reach, and avoids bottom-contact interference (OSG)[7]One source / reference
- For internal gears in particular, check collision avoidance between tool and workpiece in the design. Interference checking is done in software by comparing the tool path with the cut groove surface[9][4]
- With a straight-tooth shank-type tool, interference can occur between the groove and the back side of the blade on a workpiece with a small diameter and wide face width. A wafer cutter has very short teeth with relief, so it can avoid interference even in helical grooves that wrap around a small-diameter workpiece[4]One source / reference
- Bell-type (deep counterbore) and shank-type tools are available to suit the workpiece and the equipment[6]One source / reference
How to choose cutting conditions (sliding speed, feed, depth of cut)
11
- The main cutting conditions are (1) sliding speed (at the pitch circle of workpiece/tool, which affects cutting temperature), (2) feed (per workpiece revolution, which affects chip thickness), and (3) depth of cut (in the tooth depth direction, which affects effective rake angle and chip thickness). All are closely related to tool life and cycle time[5]One source / reference
- First decide the target tool life and cycle time, consider which to prioritize, and choose conditions accordingly. Set the targets from production volume[5]One source / reference
- If the sliding speed is too low, cutting force is large; if too high, cutting temperature rises and tool life is short. The right value varies with the work material[5]One source / reference
- Reducing speed from 300 m/min to 150–200 m/min (UCS) and raising depth of cut and feed to keep productivity greatly improved tool life (Gleason, carbide blades)[4]One source / reference
- Reducing both feed and depth of cut improves tool life but greatly increases cycle time (external m2.0, 75T, SCM420H, 150 m/min: feed 0.3→1.5 mm/rev takes chip thickness 0.22→0.80 mm, cycle time CT 56→23 s. Depth of cut 0.6→1.2 mm/pass takes effective rake angle −26°→−36°, chip thickness 0.22→0.50 mm, CT 56→36 s)[5]One source / reference
- Recommended conditions for internal teeth (NACHI): crossed-axes angle about 20°, cutting speed 100–120 m/min, feed 0.1–0.3 mm/work rev, 2 or more passes[1]One source / reference
- When machining external teeth, increase the crossed-axes angle or the number of passes to reduce the absolute value of the negative effective rake angle and the chip thickness. A larger crossed-axes angle raises relative speed and more passes increase the number of cutting-edge contacts, so a loss of tool life or longer machining time cannot be avoided[1]One source / reference
- Shifting the workpiece angle slightly at each depth of cut (set-over) turns U-shaped chips into L-shaped ones and reduces blade wear. Alternating the set-over direction every workpiece makes wear even (Gleason's infeed strategy)[4]One source / reference
- Guideline conditions (wet): 100 m/min for a solid G50 HSS tool with AlCroNite, about 300 m/min for carbide blades (H10F + ALCRONA-Pro) (Gleason). With carbide blades, dry cutting gave a better finished surface, equal or less tool wear, and about 15% lower spindle power[4]One source / reference
- Machining example: Nidec's GRANMET SK (powder-metallurgy HSS for skiving) + MightyShield Σ, 35T spur tool, machining m1.5, 70T, 20° SCM440 (HB270–300) at 70 m/min cutting speed, axial feed 0.4–0.1 mm/rev, 5 passes, with 1.6 times the life of the conventional product (MX-1)[12]One source / reference
- Machining example: Super Skiving at 130 m/min cutting speed and 90 s cycle time (gear shaper: 50–90 m/min, 180 s), internal m2, 57T, 20°, 18° RH, SCM415. About 250 pieces at a 0.3 mm wear limit[2]One source / reference
Choosing tool material and coating
6
- Powder-metallurgy HSS (PM-HSS) tools need a small investment but wear more. Carbide has higher material and manufacturing cost but is worth using at high volumes and on high-strength materials[9]One source / reference
- Powder-metallurgy HSS with high wear resistance suits skiving. The wear mode differs with work material and machine, so choose accordingly. NACHI recommends FAXG1 where wear resistance is the priority and FAP2 where chipping resistance is the priority (FAP is inexpensive, FAP2 suits difficult-to-cut materials, FAXG1 suits general materials)[5][6]One source / reference
- Nidec's GRANMET SK is a powder-metallurgy HSS for skiving, highly alloyed for hardness and wear resistance, aimed at high-hardness workpieces in difficult-to-cut materials[12]One source / reference
- Without a rake face coating, wear progresses early (after 20 pieces the outer-circumference cutting edge recedes about 0.5 mm, while with the coating it hardly progresses). Skiving can be called a process that presupposes a rake face coating, and tools without a rake face coating need recoating at every regrind[1][6]One source / reference
- Finishing after heat treatment (hard machining) uses a carbide skiving cutter. By choosing the carbide grade, there are cases of stable machining even without a rake face coating (NACHI's NF20S + DuAl Hard, m1.05, 96T internal, 110 m/min, feed 0.10 mm/rev, stock En0.12 mm, wear 0.07–0.09 mm after 100 pieces)[1]One source / reference
- OSG's skiving cutters range from m0.55 to m6.0, in powder-metallurgy HSS (XPM) and cemented carbide, for general steel, aluminum alloy (DLC) and high-hardness steel (carbide)[7]One source / reference
Correcting profile and lead
3
- Changing the crossed-axes angle or offset angle changes the workpiece profile, which allows profile correction (in simulation, changing the crossed-axes angle by ±2° changed the left and right profiles; the tilt trend also matched in actual machining)[1]One source / reference
- If both flanks have a small pressure angle error of the same sign, it can be corrected with the tool tilt angle. For large errors or errors of opposite sign, correct-grind the blade[4]One source / reference
- Crowning can be applied to the lead (not possible with gear shapers or broaches on internal teeth). Pressure angle and lead modification are possible[1][9][7]
Types of tool shape
3
- Types include shank-type (slightly tapered, no helix on the teeth), wafer cutters (few regrinds), and tools with helical teeth and serration-style rake faces (Gleason). Bell-type and shank-type (NACHI). Shank-type with replaceable carbide heads and through-center coolant (OSG). Indexable cutter heads with rows of carbide stick blades (Gleason)[4][6][7]
- Traditionally, skiving was done with an ordinary shaper cutter (pinion cutter)[4]One source / reference
- Tool specifications and conditions are often optimized by simulation (cutting force estimation, tool life prediction)[2][6][4]
÷Formulas
Basic angular velocity of the workpiece (synchronization at the tooth-count ratio)
ω1 = (Z_Tool / Z_work) · ω_Tool[4]1 source · reference
- ω1
- Basic angular velocity of the workpiece
- Z_Tool
- Tool (virtual) tooth count
- Z_work
- Workpiece tooth count
- ω_Tool
- Tool angular velocity
Additional angular velocity for helical gears (from feed)
ω2 = V_ax · tanβ / (D02 / 2)[4]1 source · reference
- ω2
- Additional angular velocity of the workpiece from the helix angle
- V_ax
- Feed rate (axial)
- β
- Workpiece helix angle
- D02
- Workpiece pitch circle diameter
Relation between tool and workpiece peripheral speeds (cutting speed is the difference vector between them)
V_tool = V_gear · cosβ / cos(Σ−β). With β = 0° (spur gear), V_tool = V_gear · 1 / cosΣ; with β = Σ, V_tool = V_gear · cosβ[4]1 source · reference
- V_tool
- Peripheral speed vector at the tool pitch circle
- V_gear
- Peripheral speed vector at the workpiece pitch circle
- β
- Workpiece helix angle
- Σ
- Crossed-axes angle (axis angle between tool and workpiece)
Worked Example The cutting speed V_cut is the difference between the workpiece and tool peripheral speed vectors at the cutting zone. With this equation the cutting speed vector points in the lead direction
Tool helix angle and crossed-axes angle
Same helix hand: Σ = tool helix angle − workpiece helix angle; opposite hand: Σ = tool helix angle + workpiece helix angle (from the example in the text)[4]1 source · reference
- Σ
- Crossed-axes angle
Worked Example Workpiece 15°, tool 20°: 5° for the same hand, 35° for opposite
⚠Troubleshooting
Open a symptom to see the possible causes and fixes. The causes are not necessarily to be suspected from the top down. They change with the combination of workpiece, machine and tool.
Quick damage and wear at the outer-circumference cutting edge of the tool[5][1][4]
Main causes
- The outer circumference (cutting edge tip) of the tool does the most work, so the tip of the cutting edge is damaged (the main wear mode is recession of the outer-circumference cutting edge)
- The cutting edge remains sharp, and stress concentrates at one point
- The cutting edge has the longest chip-forming stroke, and the slip in the profile direction is also greatest at the edge
Fixes
- Put a small honing on the cutting edge (a case with doubled life and stable performance). However, if the honing is too large, the thrust force becomes larger than the main cutting force and pushing becomes stronger than cutting, so use a proper amount
- Choose the optimum tool shape, material and coating, and proper cutting conditions
Rapid rake face wear (the cutting edge recedes greatly after a few dozen pieces)[1][6]
Main causes
- No rake face coating (the coating was lost in regrinding)
Fixes
- Use a tool with a rake face coating, and recoat at every regrind
Chipping of the cutting edge / vibration[5][4][3][10]
Main causes
- Work material is relatively hard, or the machine lacks rigidity and tends to vibrate
- Top rake angle over 4° on a carbide blade
- Meshing is uneven and load fluctuates greatly, as with methods that change the synchronization ratio
- Low dynamic rigidity of the machine's gear train (conventional mechanical machines)
Fixes
- Changing to a tool material with high chipping resistance (such as NACHI's FAP2) changed the damage from chipping to a wear mode and doubled life in one case
- Make the tool shape highly rigid (a case where FEM and dynamic rigidity analysis reduced displacement)
- Use a machine with direct drive for high synchronization accuracy and rigidity
Tool wears abnormally fast when cutting external teeth[1][6]
Main causes
- External teeth have a larger absolute value of negative effective rake angle than internal teeth (e.g., −36.8° vs −17.0°)
- Fewer working teeth, and chip thickness is about twice that of internal teeth
- Conditions were set about the same as for internal teeth (a case of abnormal wear after 3 pieces)
Fixes
- Increase the crossed-axes angle (30° or more)
- Increase the number of passes
- Use conditions that reduce the absolute value of the negative effective rake angle and the chip thickness (a loss of tool life and longer machining time cannot be avoided)
Raising the feed damages the tool / chips interfere[5]
Main causes
- Large feed raises cutting load and temperature
- Chips become thick, and chips from the left and right flanks of the tool interfere
Fixes
- Reduce the feed (decide by balancing with cycle time)
Raising the depth of cut causes large wear at the cutting edge[5]
Main causes
- A large depth of cut makes chips thicker, and at the end of the cut the effective rake angle becomes strongly negative and cutting load increases (0.6→1.2 mm/pass: −26°→−36°)
Fixes
- Reduce the depth of cut and split into more passes (cycle time increases)
U-shaped chips come out and blade wear is high[4]
Main causes
- Chips from the side and the bottom do not separate and stay connected (U shape)
Fixes
- Use an infeed strategy that shifts the workpiece angle at each depth of cut (set-over) to make L-shaped chips
- Give the left side of the blade a positive side rake angle (e.g., 2°) to make L-shaped chips
Sliding speed is wrong and tool life is short[5][4]
Main causes
- Sliding speed is too low and cutting force is large
- Sliding speed is too high and cutting temperature rises
Fixes
- Use a sliding speed suited to the work material
- Reduce the speed (e.g., 300→150–200 m/min) and raise feed and depth of cut to keep productivity
Profile error (left-right profile tilt, pressure angle deviation)[1][4]
Main causes
- Error in the crossed-axes angle setting (simulation example where ±2° changes the left and right profiles)
- Error in the offset angle
- Tool blade profile error
Fixes
- Correct the crossed-axes angle and offset angle to correct the profile (there is also an example where only one flank was corrected)
- If both flanks have a small pressure angle error of the same sign, correct it with the tilt angle; if large or of opposite sign, correct-grind the blade
Tooth thickness (space width) does not match[4]
Main causes
- Machine setting (tooth thickness, depth) or blade profile is wrong
Fixes
- Give tooth thickness priority over depth, and match tooth thickness by cutting the space deeper within the allowed range (making it shallower is not recommended)
- If it does not match within the range, correct the blade. If the space width is too small, cut the sides on a second pass (time increases)
Pitch error and workpiece runout[4][13]
Main causes
- Tool tooth count and workpiece tooth count have a common divisor
- Tool runout (example prediction of pitch error from 20 µm runout)
Fixes
- Do not let the tool tooth count and workpiece tooth count have a common divisor
Finish differs between left and right flanks[4][3]
Main causes
- Because of the kinematics of skiving, cutting conditions differ slightly between the left and right flanks (chips on the right side are thinner and cracks form)
- Rotation direction and tool helix change the tool path and cutting zone, causing a difference in tooth contact left and right
Fixes
- Making the feed direction about 3° steeper than for the right flank gives a cleaner finish on the right flank
- Use a method that machines the left and right flanks separately, or one that controls the rotation direction (examples with special tools)
Interference and collision between tool and workpiece (step, groove)[2][4][9]
Main causes
- A large crossed-axes angle makes interference with internal gears likely
- On a workpiece with a small diameter and wide face width, the back side of a straight-tooth tool's blade interferes with the groove
- The back of a long spur-type tool with a small relief angle interferes with the groove
Fixes
- Make the tool barrel-shaped (Super Skiving)
- Use a wafer cutter with short teeth with relief
- Eliminate back-side interference with the tool tilt angle
- Perform interference checking (collision avoidance) at the design stage
↻Regrinding and Tool Life Management
- Tools without a rake face coating need recoating at every regrind[6]One source / reference
- For carbide cutters used for finishing after heat treatment, there is a method of automatically regrinding the rake face on the machine. Recoating the rake face is not needed (the original coating on the flank protects the blade). Sharpening often with small stock removal keeps quality constant (Gleason)[8]One source / reference
- Regrinding and recoating outside takes 45–60 minutes of setup each time, and the roundness of the cutting edge (edge radius) matters in post-heat-treatment finishing that takes thin chips[8]One source / reference
- An appropriate amount of honing on the cutting edge extends and stabilizes life[5]One source / reference
- Examples of life judgment: 0.3 mm wear limit (Mitsubishi Heavy Industries), number of pieces machined to reach 0.2 mm wear (NACHI's coating comparison)[2][5]
- Indexable carbide blades can be resharpened to correct tooth thickness, depth and pressure angle[4]One source / reference
- Manufacturers offer regrinding and recoating services[9]One source / reference
◎Tool Inspection
- Example of tool accuracy class: JIS class AA (JIS B 4356-1996). Machined workpiece accuracy: new JIS grade 5 (JIS B 1702-1:2016) (OSG; varies with machining environment)[7]One source / reference
- Judge wear by the recession of the outer-circumference cutting edge (flank wear)[1][5]One source / reference
- Tool runout becomes workpiece pitch error (example prediction from 20 µm runout)[13]One source / reference
- The lead waviness after machining reflected the skiving feed marks (scallops), and its amplitude was under 5 µm[4]One source / reference
☑What to Specify When Ordering
These are the items to give the tool maker when requesting a quotation or manufacture. Most of them are determined from the gear data table (the table on the drawing).
| Item | Why it is needed / how to decide |
|---|---|
| Workpiece data (m, pressure angle, number of teeth, helix angle and hand, internal/external, face width, material and hardness) | The tool profile is calculated from the workpiece's basic rack and the crossed-axes angle. Conditions and the crossed-axes angle differ greatly between external and internal teeth. For high-hardness and difficult-to-cut materials, choose the tool material accordingly[4][1][5] |
| Workpiece shape (stepped, blind shape, surrounding shape) | To check collision avoidance between tool and workpiece (especially for internal gears). The tool shape (bell, shank, wafer) also changes[9][6][4] |
| Equipment used (multitasking machine or dedicated machine, model) | The tool lineup is divided into those for multitasking machines (lathe, MC) and for dedicated skiving machines. Low machine rigidity makes chipping likely[6][5] |
| Crossed-axes angle (range the machine can reach) | The crossed-axes angle determines cutting speed, cutting performance and tool profile (examples: internal about 20°, external 30° or more)[1][6][4] |
| Tool tooth count and helix angle | Do not share a common divisor with the workpiece tooth count. The tool helix angle and workpiece helix angle determine the crossed-axes angle[4] |
| Tool type (conical / cylindrical, disc, bell, shank, indexable) | Conical has a built-in relief angle and is placed on center; cylindrical needs tilt or an offset placement[9] |
| Tool material (powder-metallurgy HSS / carbide), coating, and whether there is a rake face coating | Choose by wear mode (wear or chipping), work material and production volume. Without a rake face coating, wear is early and recoating is needed at every regrind[5][9][6] |
| Green machining or post-heat-treatment finishing, wet or dry | Post-heat-treatment finishing uses a carbide cutter. Some tools can also handle dry cutting[1][9] |
| Target cycle time and tool life (production volume) | Conditions (sliding speed, feed, depth of cut) are decided by which of these two is prioritized[5] |
| Profile and lead modification (crowning, etc.) | Can be applied through the tool profile and the crossed-axes angle and offset angle settings[1][9] |
Printed from Kezuriba (kezuriba.net/en/gears/tools/skiving-cutter/)
+Related Topics
Comparison with other internal gear machining methods (choosing the process)
3
- Gear shapers and broaches are the mainstream for cutting internal gears. A shaper is less restricted by workpiece shape but has a long machining time. A broach is productive but has high equipment cost, is hard to adjust for accuracy, and cannot machine stepped or large internal gears. Pinion-type skiving has good productivity and accuracy but short tool life (Mitsubishi Heavy Industries comparison)[2]One source / reference
- Accuracy guideline (new JIS): shaper and broach N7–N12, hob and skiving N6–N12 grades (JTEKT comparison table)[3]One source / reference
- Machining accuracy example: internal m1.5, 70T, 20° RH machined with a 30T tool, machining time 90 s, profile error 7 µm (new JIS grade 6)[6][1]One source / reference
Application to non-involute shapes
1
- A case where the tapered and missing-tooth shapes of a synchronizer sleeve were machined by skiving, replacing 4 machines with 1 and halving tool cost. Simulation that works backward from the workpiece shape to the tool blade profile also handles non-involute shapes such as pulleys, tapers and chamfers[3]One source / reference
⚙Other Gear Cutting Tools
📚Sources
Values without a mark agree in two or more sources from different publishers. Grade and coating names are the makers' product names, and no comparison between makers has been made. "p." is the body page of the Mitsubishi Materials catalog (C004J-H).
- Nachi-Fujikoshi (nachi-fujikoshi.co.jp)
- Mitsubishi Heavy Industries (mhi.com)
- JTEKT (jtekt.co.jp)
- Gear Technology (AGMA Media) (ik.imagekit.io)
- Nachi-Fujikoshi (nachi-fujikoshi.co.jp)
- Nachi-Fujikoshi (nachi-fujikoshi.co.jp)
- OSG (osg.co.jp)
- Gear Technology (AGMA Media) (ik.imagekit.io)
- Liebherr-Verzahntechnik — Precise and productive. Gear tools (brochure PDF)
- Mitsubishi Heavy Industries (mhi.com)
- Mitsubishi Heavy Industries — Press release: "Mitsubishi Super Skiving System" developed to machine internal gears with a barrel-shaped multi-edge tool (2014)
- Nidec Machine Tool (nidec.com)
- Fraunhofer IWU (iwu.fraunhofer.de)